Connecting ISORA Isora GRC API to Microsoft Power BI can be a daunting and timely task - from connecting to the API for each endpoint, paginating, creating the data model and creating the reports. SaltyCloud has made this easier by doing the hard part for you. Follow this set of instructions to connect Power BI to your ISORA Isora GRC instance. But first, two quick notes before we begin:
NOTE 1: The remainder of this blog post assumes your user already has an ISORA Isora GRC api key. If you haven’t already created an api key for your user, take a look at this how to article.
NOTE 2: Power BI will honor ISORA Isora GRC permissions, since the data returned by the api queries are based on a user’s permissions.
...
Download and install Microsoft Power BI desktop if you haven’t already.
NOTE: The download only supports Windows OS at this time.Open Power BI desktop, then open the ISORA-Reports-PowerBI.pbit file below.
View file name ISORA-Reports-PowerBI.pbit height 150 Next, enter ISORA_URL and USER_API_KEY variables to your ISORA Isora GRC instance and your user’s api key.
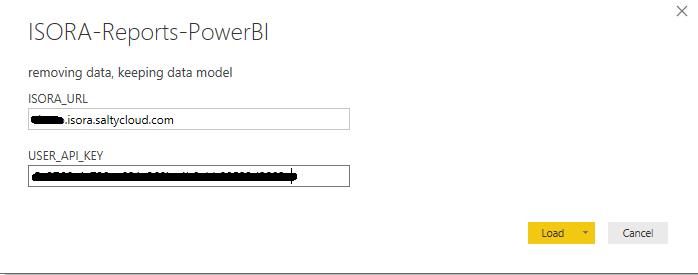
Click ‘Load’.
NOTE: After applying, Power BI will take some time to connect to your ISORA Isora GRC instance and pull data for each endpoint.Once PowerBI has completed, you will notice each page of the report is populated with data specific to your ISORA Isora GRC instance. SaltyCloud has built sample reports for each important endpoint; users, orgs, assessments, policy frameworks, inventory sheets and completed assessment reports.

...