You can also add or edit permissions by editing an OU. You must be a superuser or an Assessment Manager or IT Staff in an OU to perform this action.
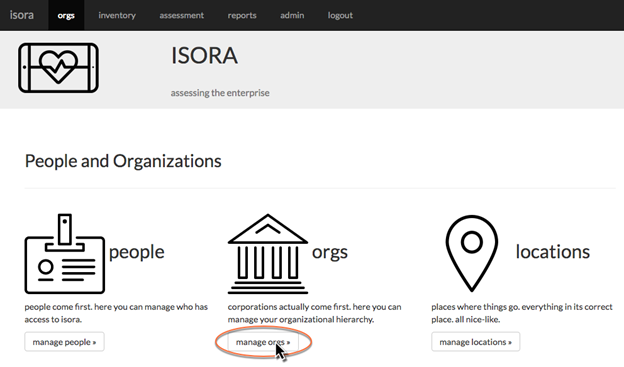
Navigate to the orgs module Settings page and click “manage orgs.”
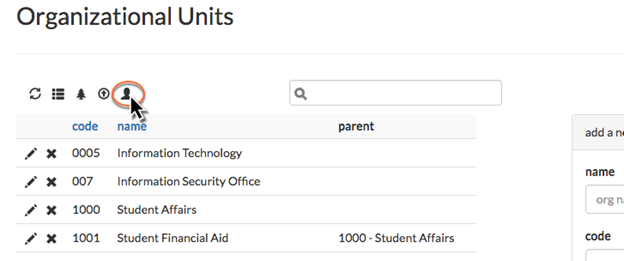
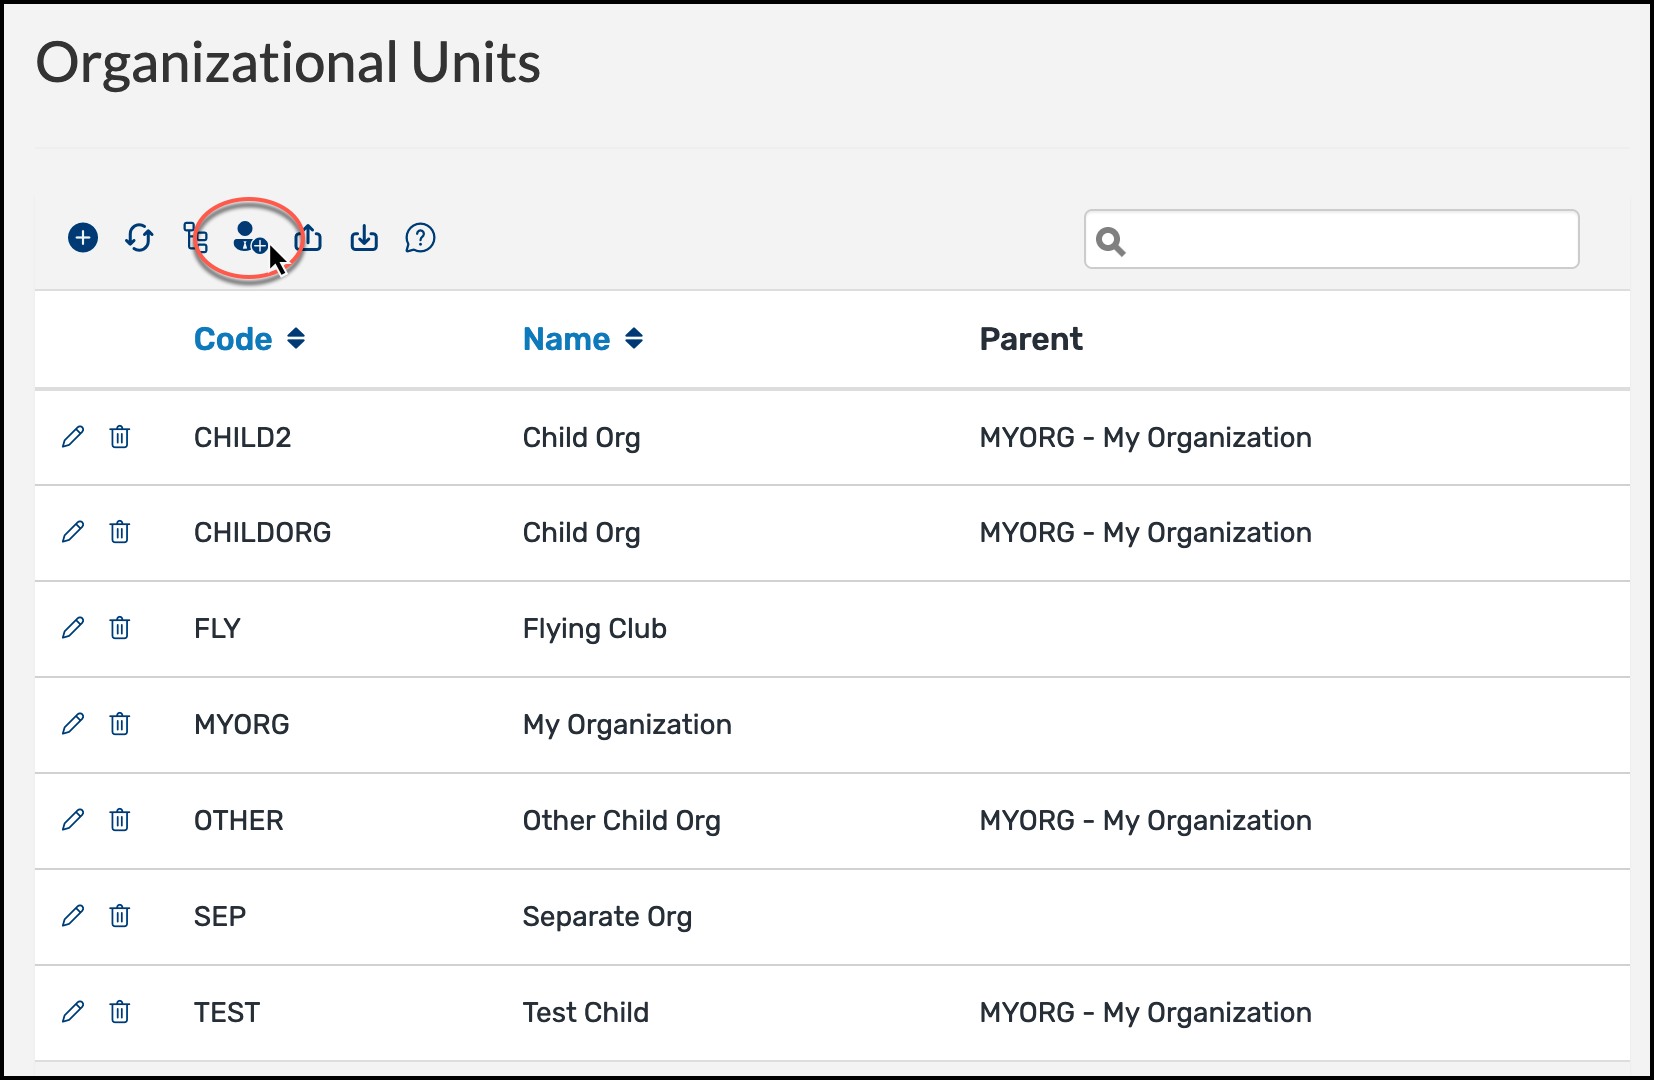
the Organizational Units link.
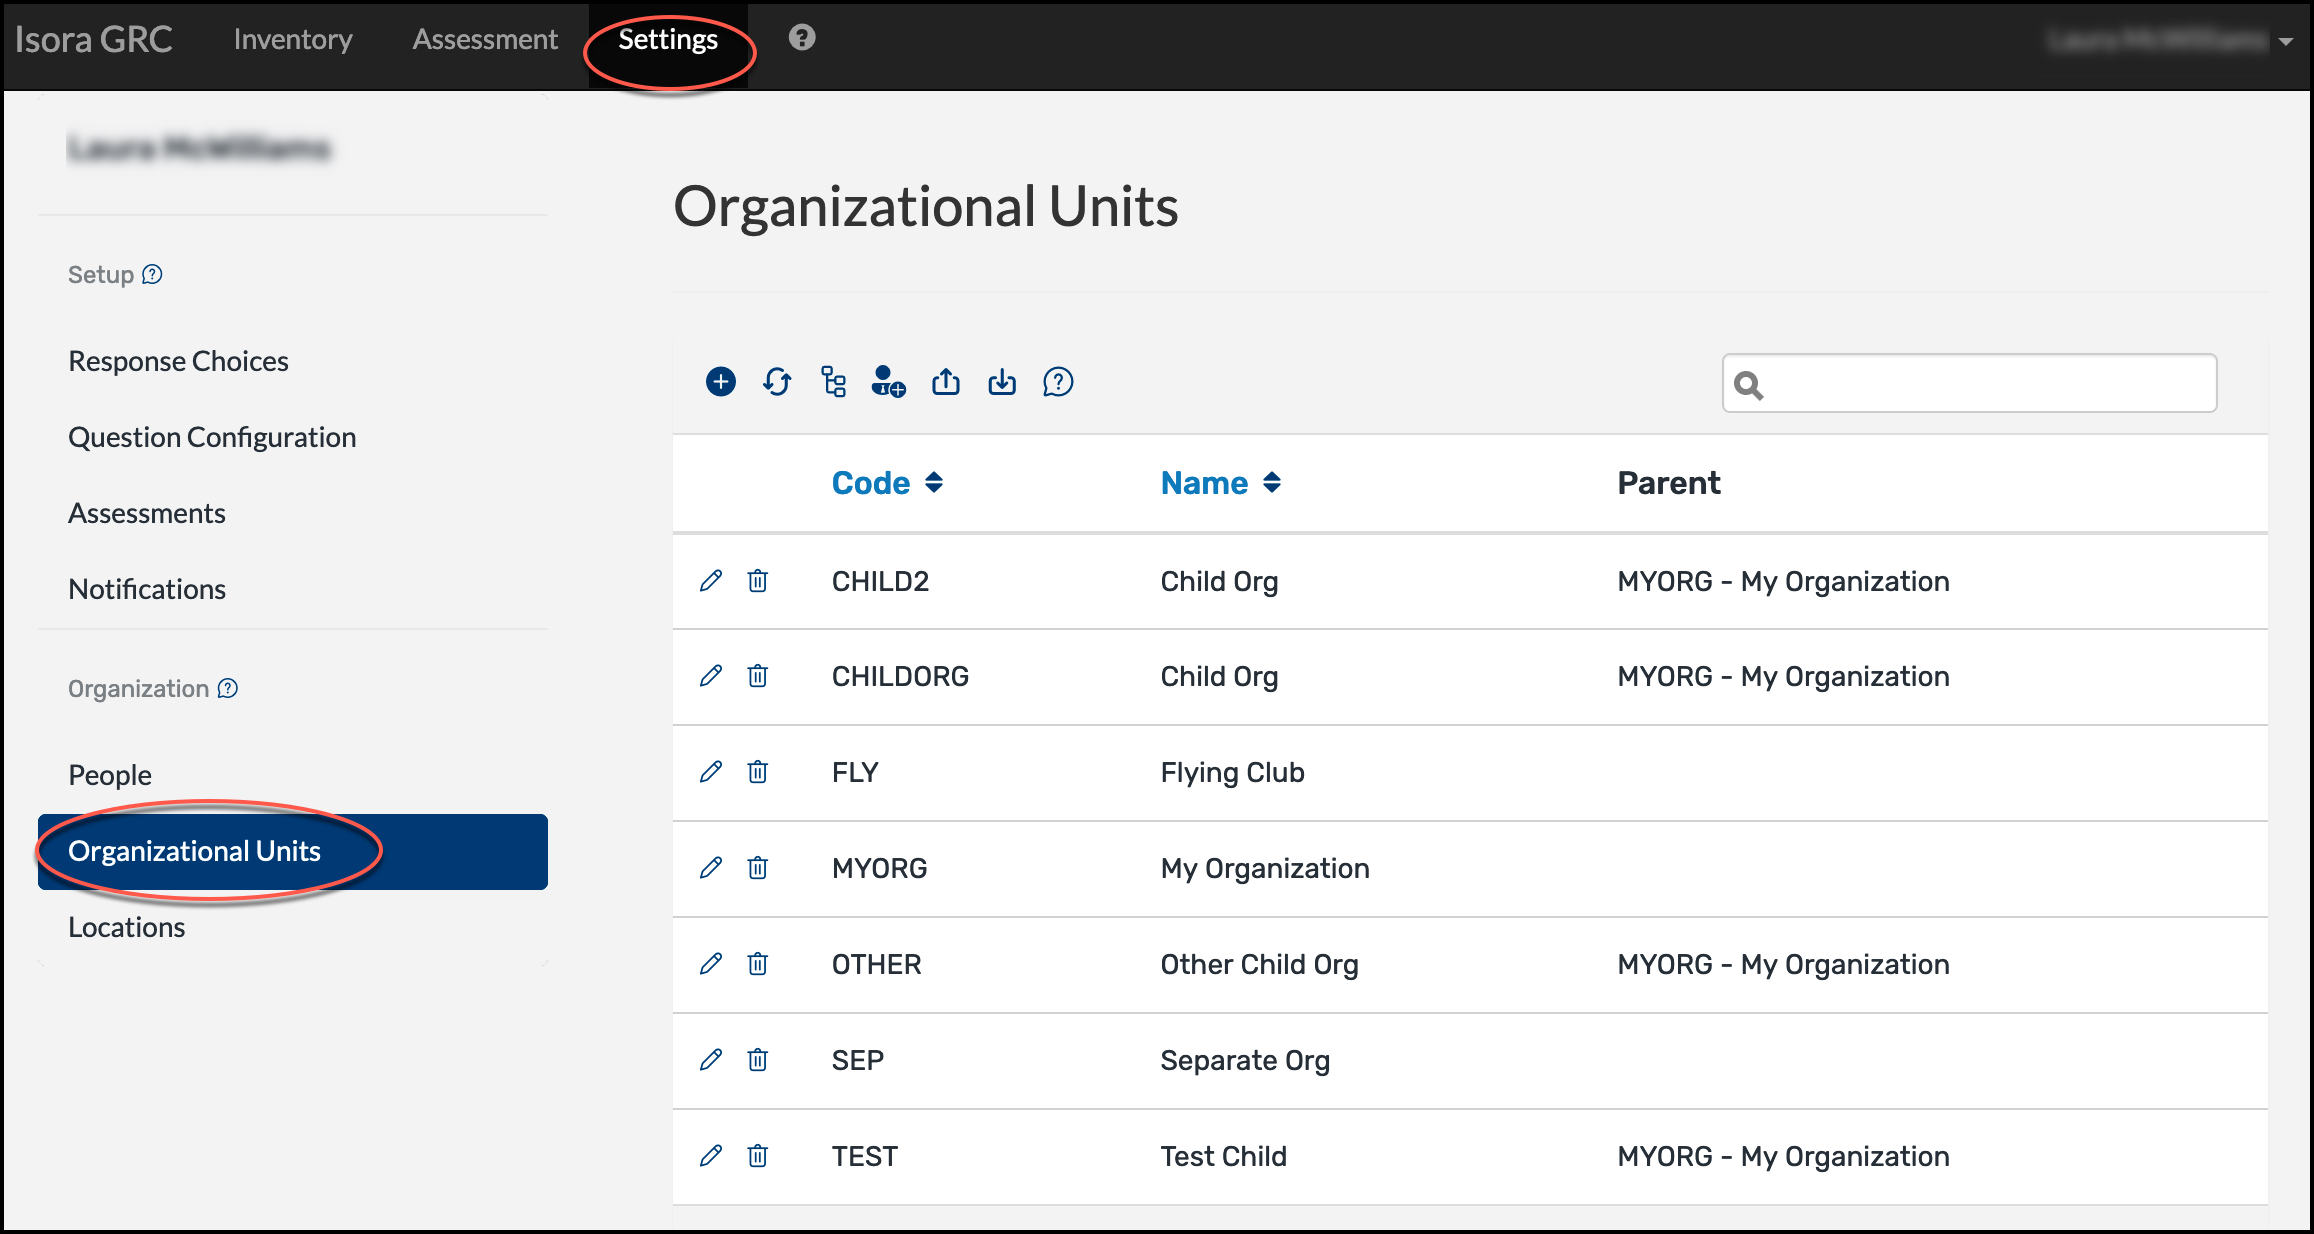
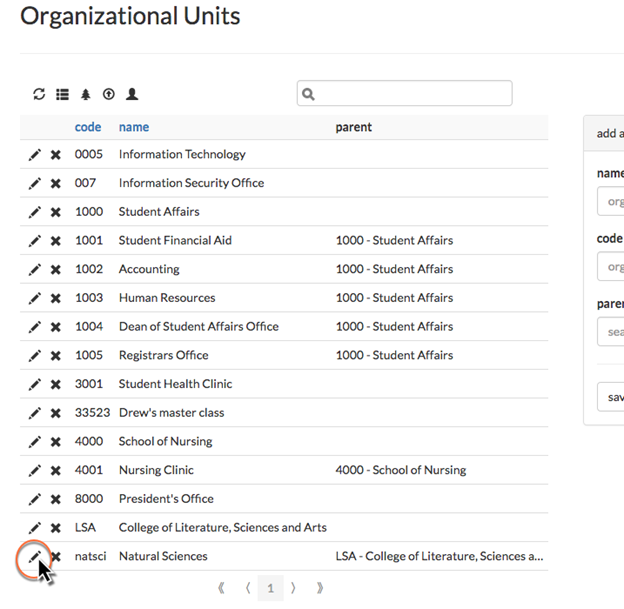
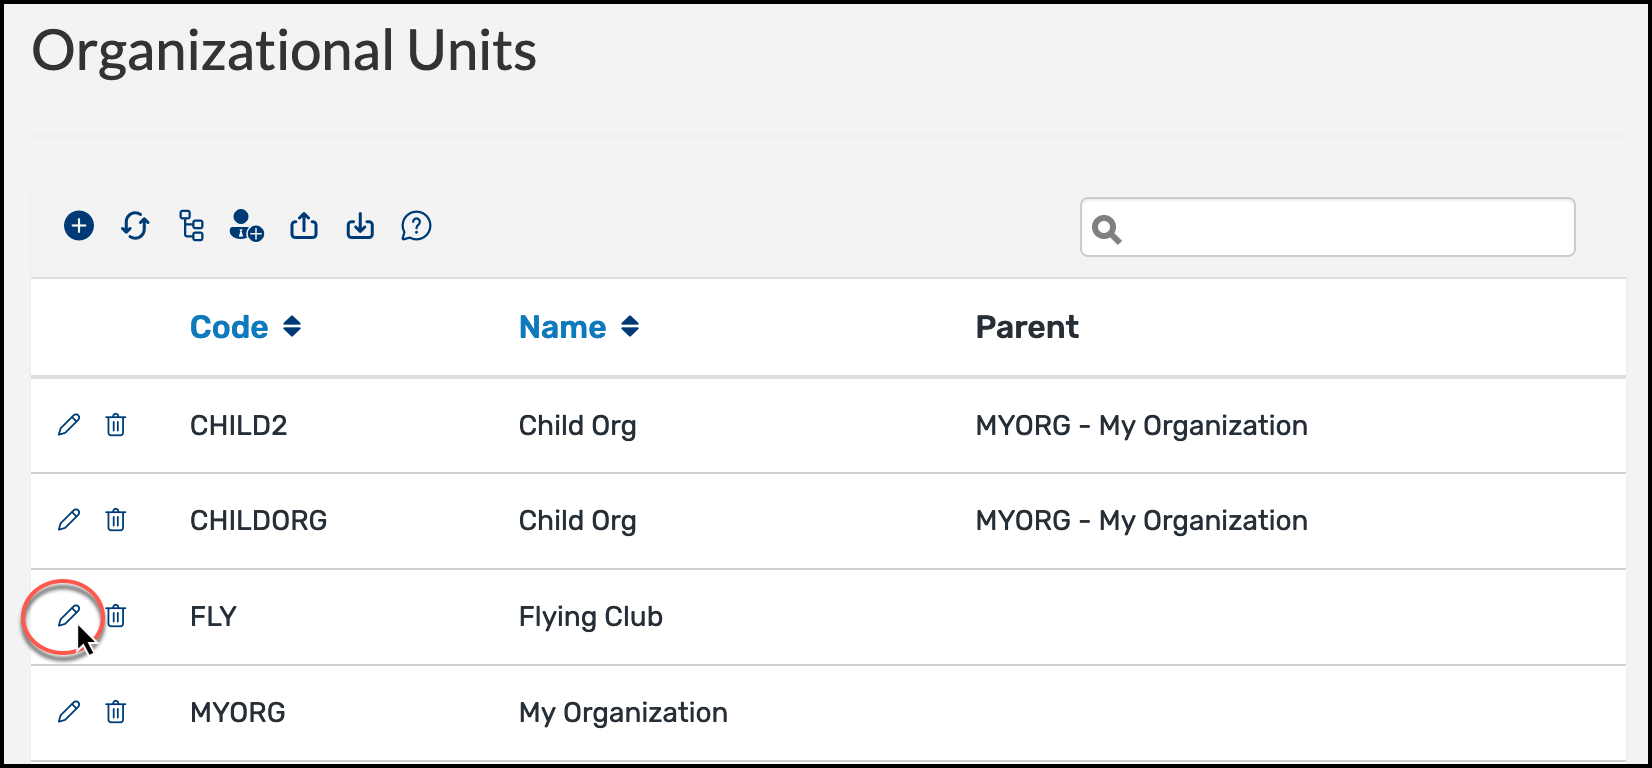
To add an individual to an OU, click the edit button (which looks like a pencil) next to the OU in the table.
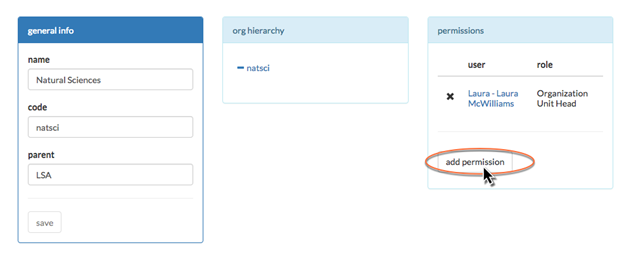
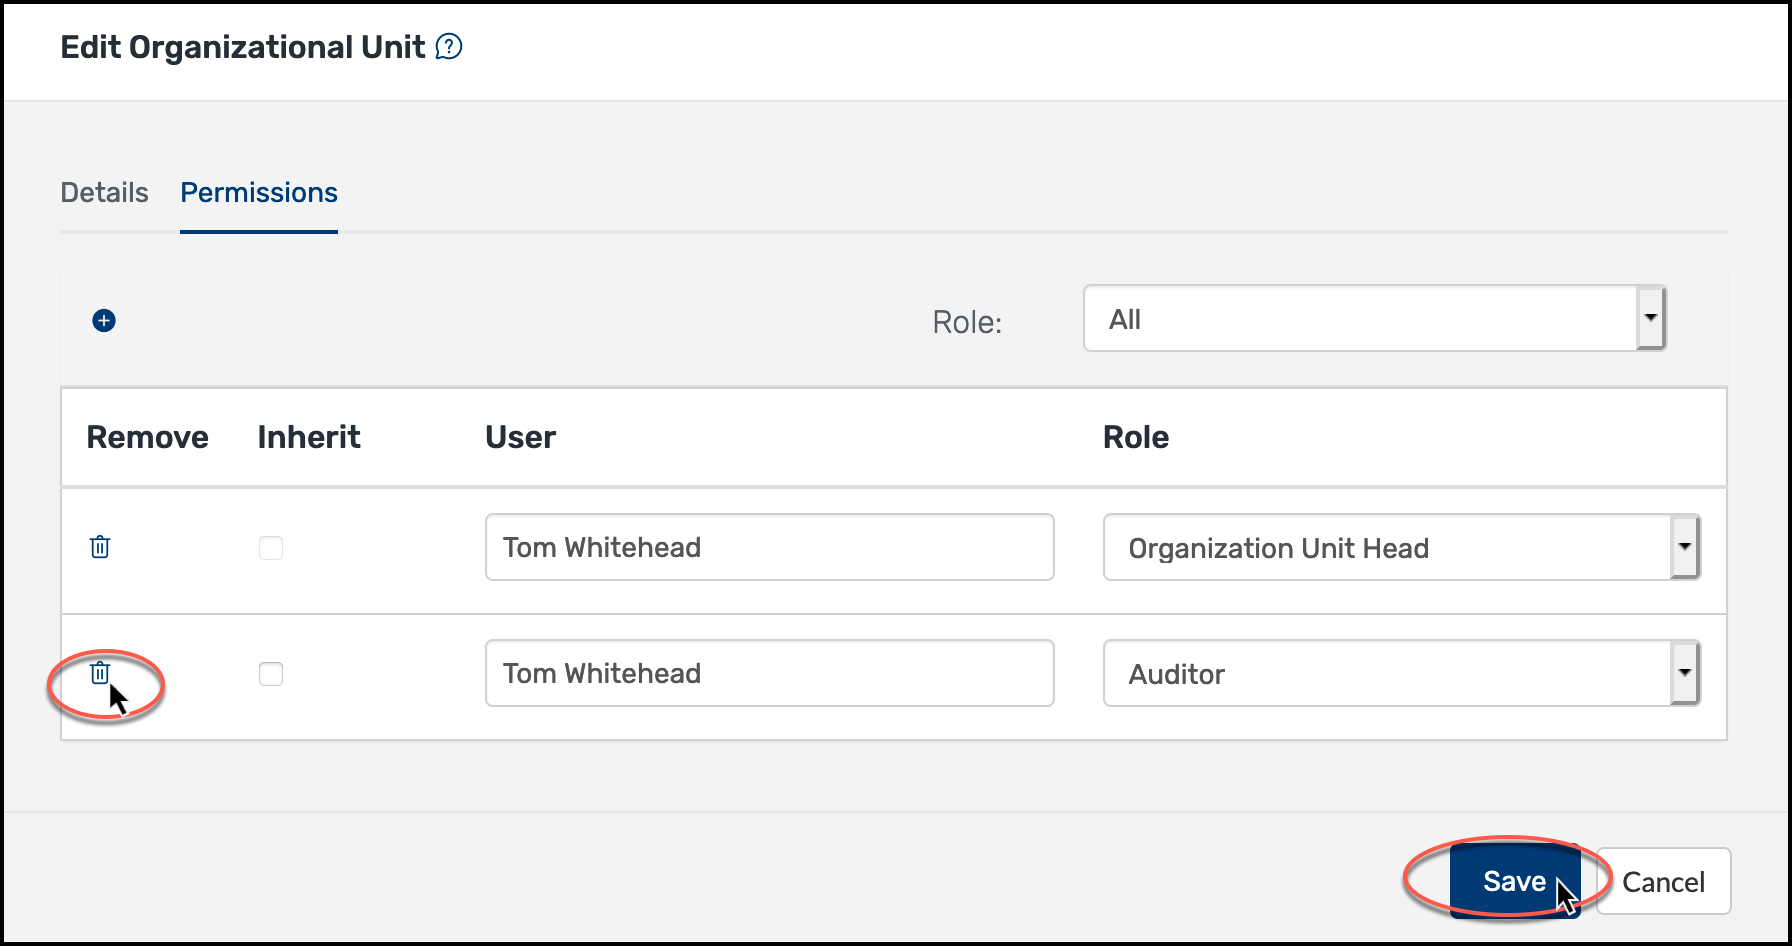
From here, you can edit the name, code and parent of an OU. You can also view where it fits into the organizational hierarchy. To add a person to the OU, click the “add permission” buttonPermissions link.
 Fill in the name of the person and
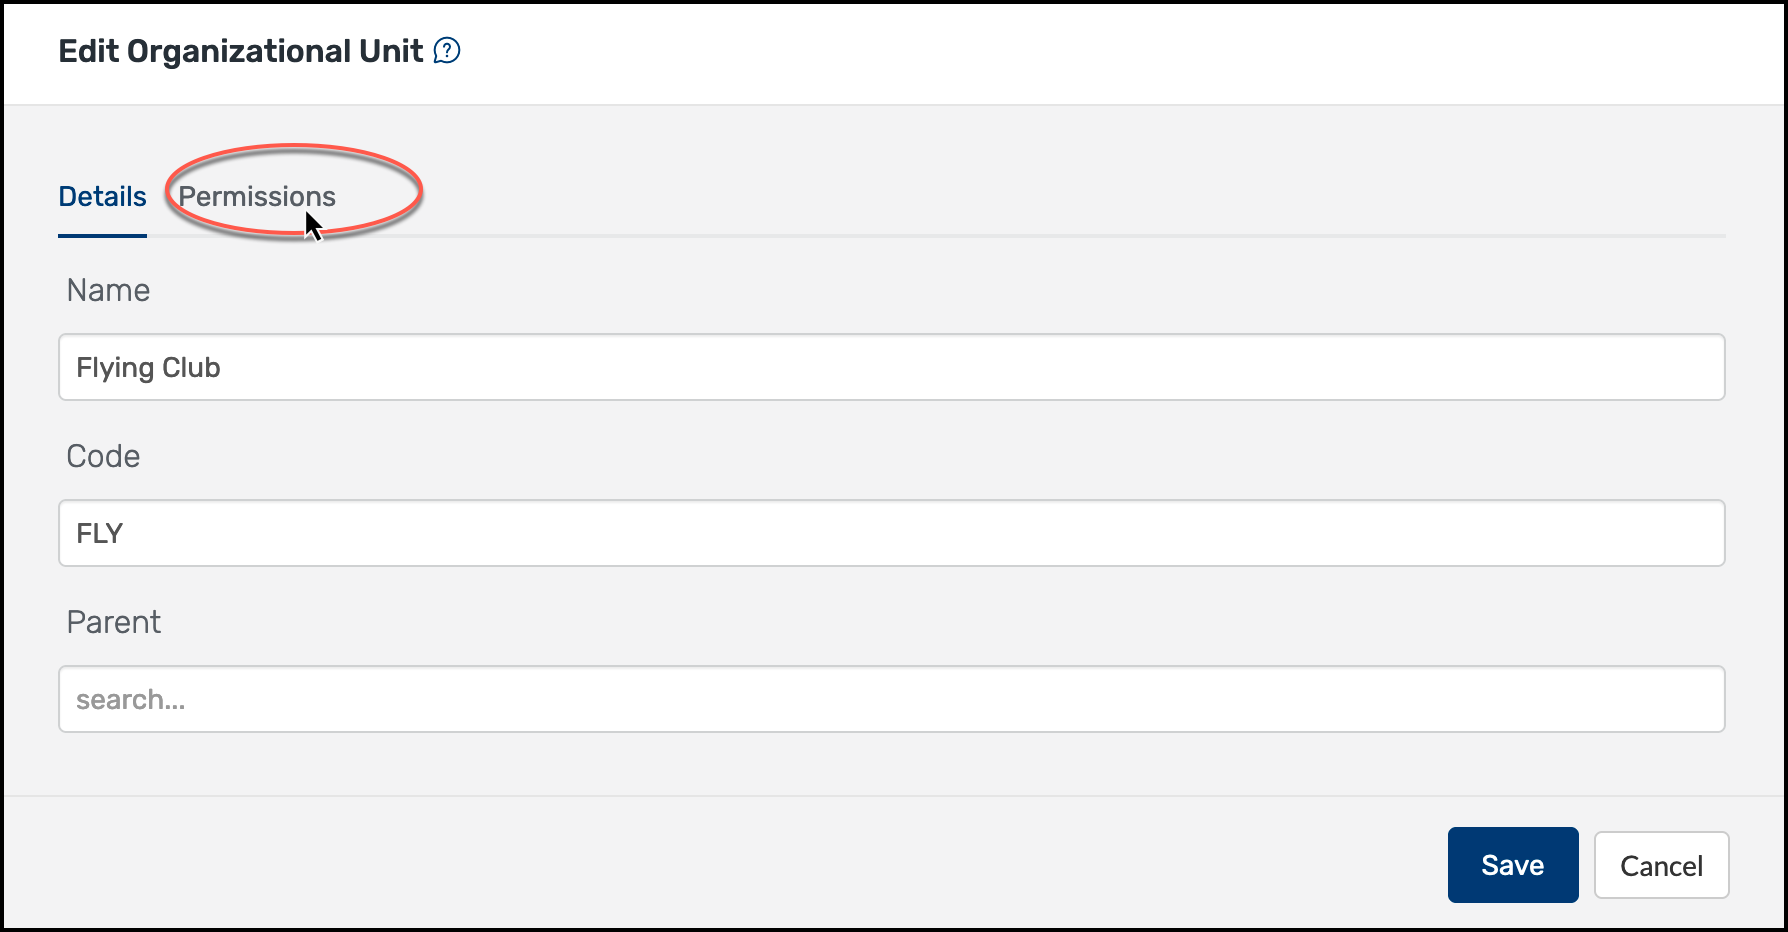
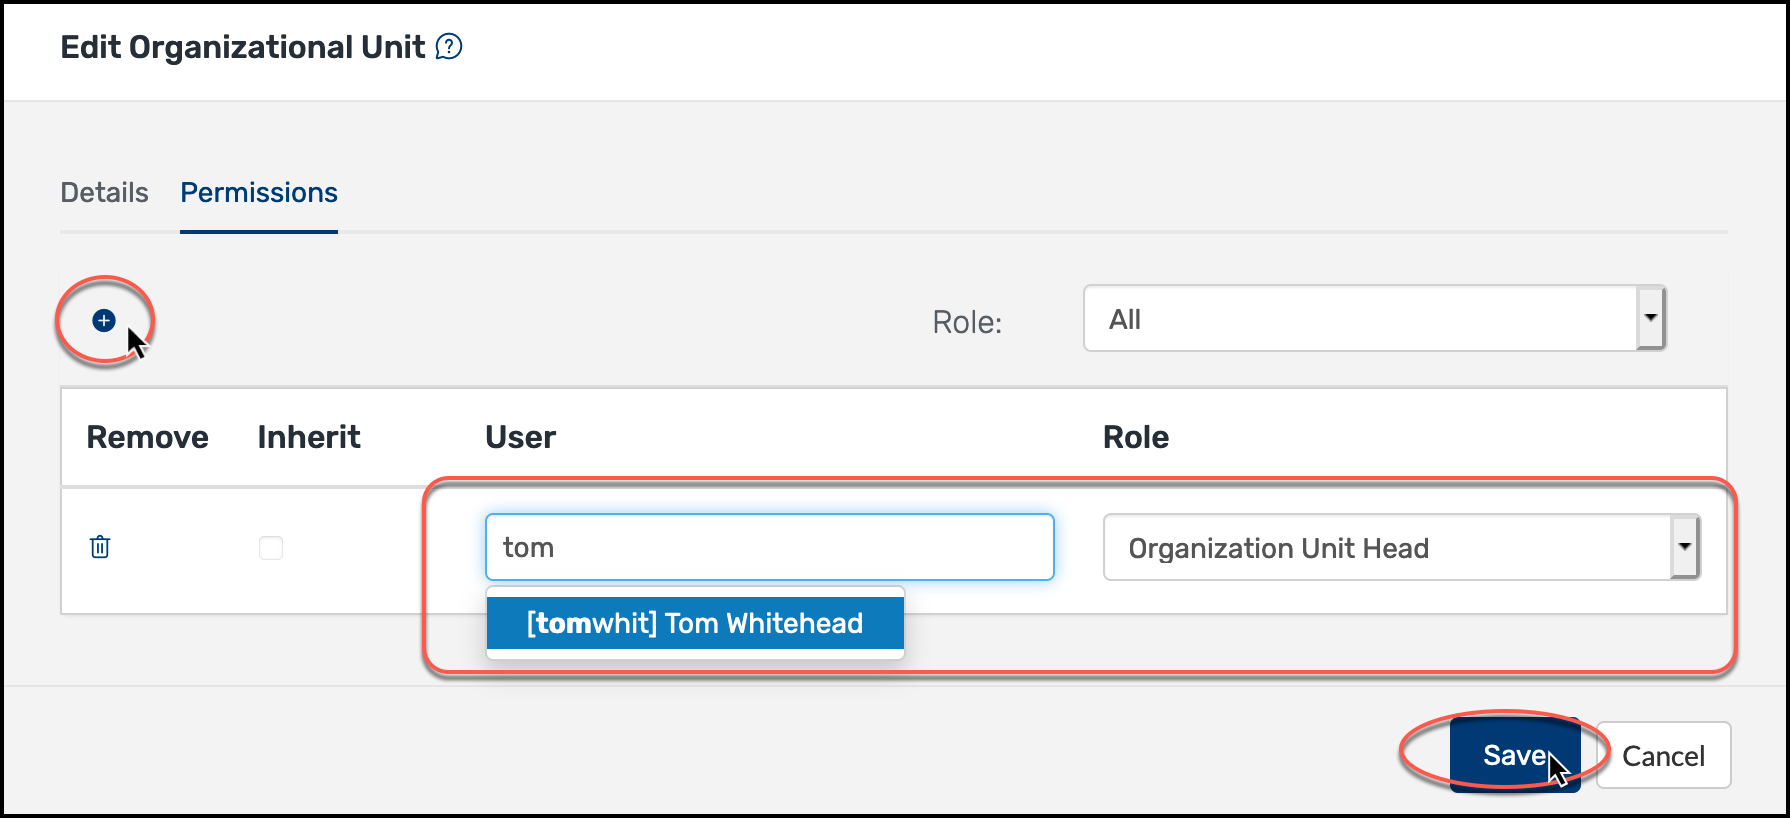
Click the + sign to add a new permission. Start typing in the search box to find the person, then choose the desired role from the drop-down list. You can add as many permissions as needed, then click “add.”

Save. (Note that each individual person may be assigned more than one role in an OU.)
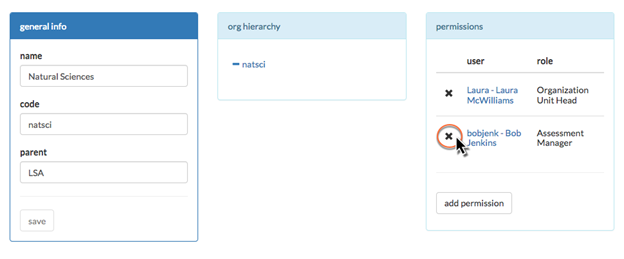
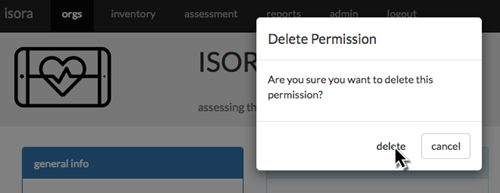
To remove a permission from the OU, on the edit page for that OU, just click the X button trash can icon next to the permission you want to remove, then click “delete” in the confirmation dialog that pops upSave.
You can upload multiple permissions using a CSV file. On the manage orgs Organizational Units section of the Settings page, next to the upload CSV button is a button that lets you upload permissions.
Use a CSV file where each line consists of a role (Organization Unit Head, Assessment Manager, IT Staff, or User), the OU code, and the username of the person to be added to the OU.
...
| hidden | true |
|---|
...
See also: CSV Upload Reference Information