7.1 Creating a Vendor Assessment
- Laura McWilliams
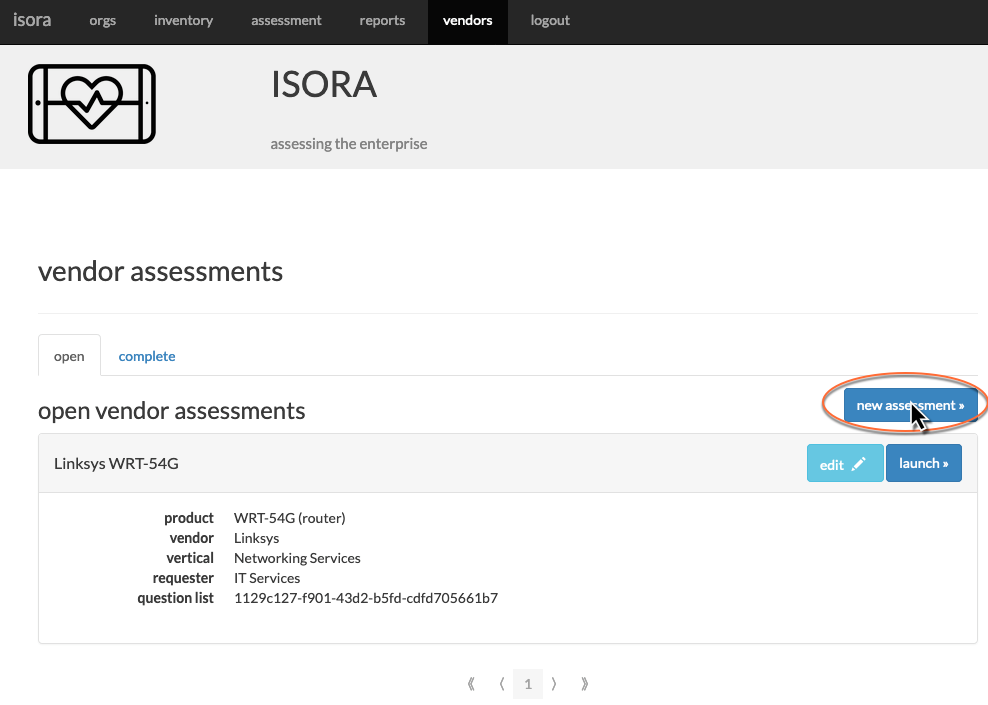
- In the open assessments tab, click the “new assessment” button.
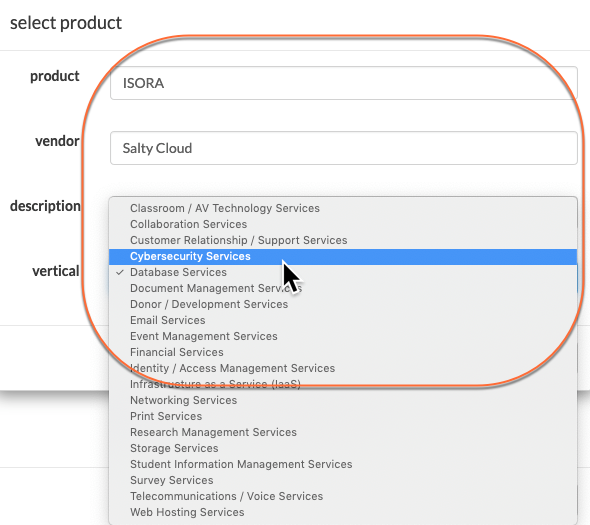
- Click the “select a product” link.

- Fill in the form, choosing an appropriate vertical (Note that the vertical choices are customizable- see Isora GRC Customizable Picklist Label Values).
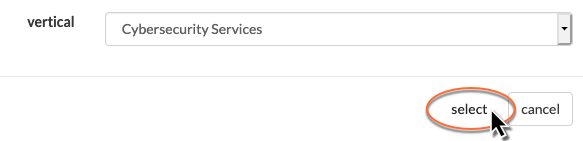
- Click the “select” button.
- You are returned to the new assessment entry box. If you realize you made a mistake, you can go back and re-enter the product info using the refresh button in the upper right corner. Fill in the rest of the fields.
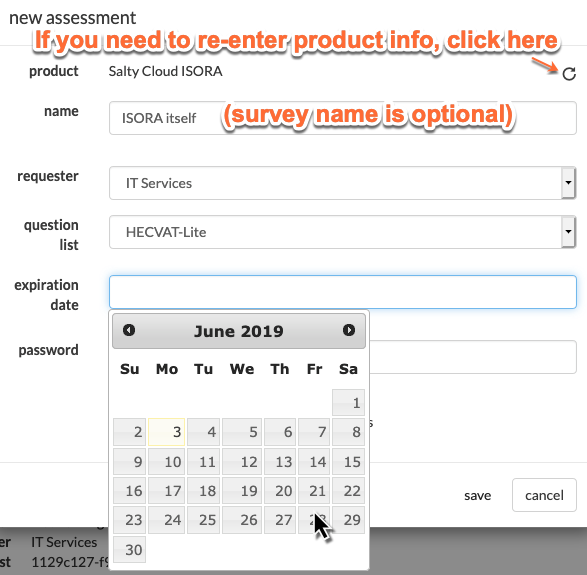
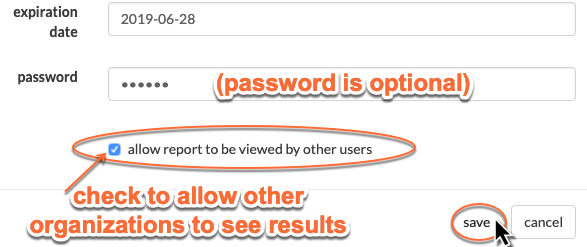
The expiration date specifies a deadline for the vendor to fill out the assessment. If the assessment hasn’t been completed by the expiration date, then the assessment will disappear from Isora GRC.
6. If you would like an extra bit of security, you can specify a password for the vendor to use to access the assessment. However, the URL itself is unique, so you can also think of the URL like a password. If you want other Isora GRC users to be able to see the results of the assessment once it’s completed, check the “allow report to be viewed by other users” checkbox. Otherwise, only other users who have an IT Staff or Assessment Manager role in the requesting organization (or superusers) will see the vendor assessment. When you're ready, click the “save” button.
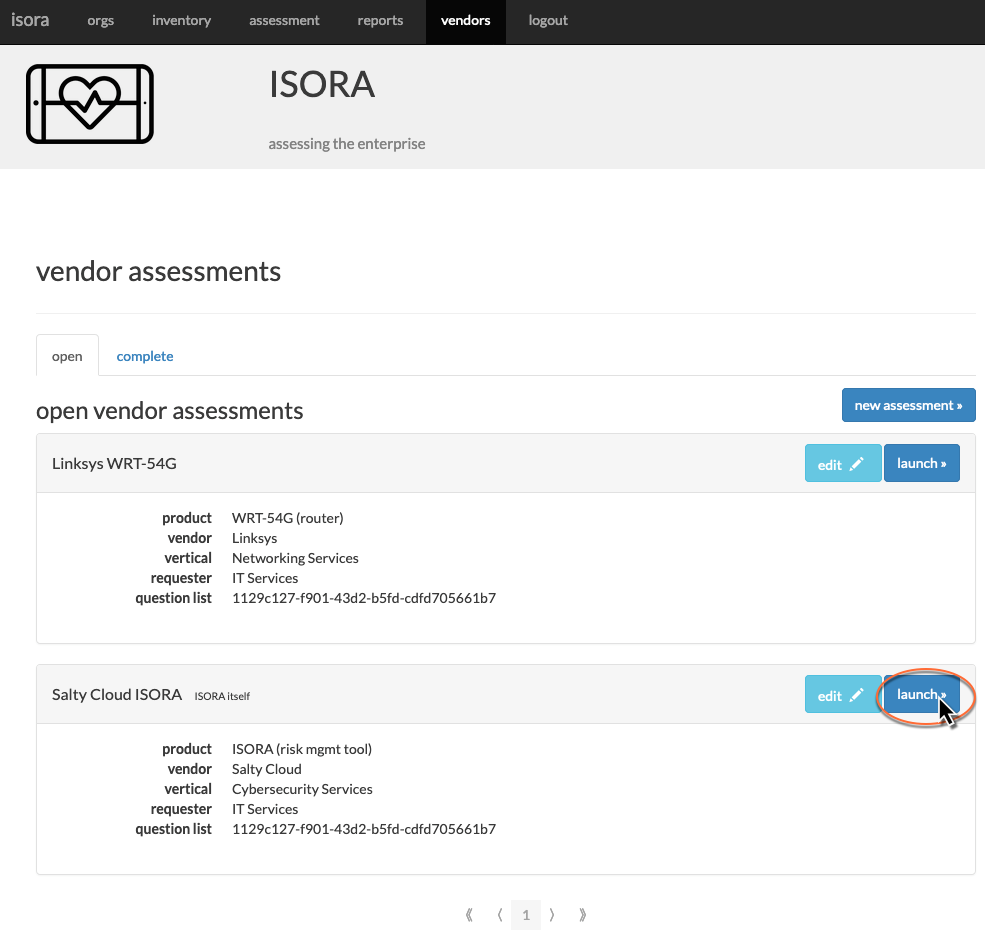
7.On the open assessments tab, you can now see your new assessment. If you are ready to submit it to the vendor, you can click the “launch” button. Once an assessment is launched, it cannot be edited.
8. The page updates to show you a URL for the vendor assessment. You can then copy this URL and share it with the vendor.
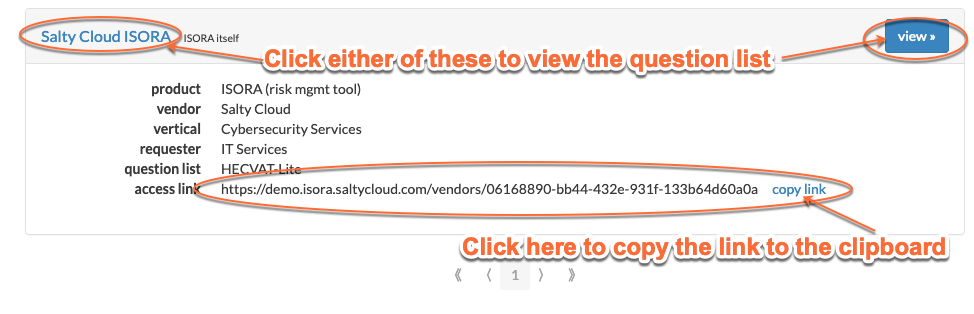
If you click on the “view” button or name of the assessment, you can view the list of questions, in case you actually wanted to fill it out yourself rather than having the vendor fill it out.
Next: 7.2 Working with open assessments
Related content
If you can't find what you are a looking for and need support, email support@saltycloud.